Game-Ready Assets | Optimized for Unity & Unreal | Instant Download
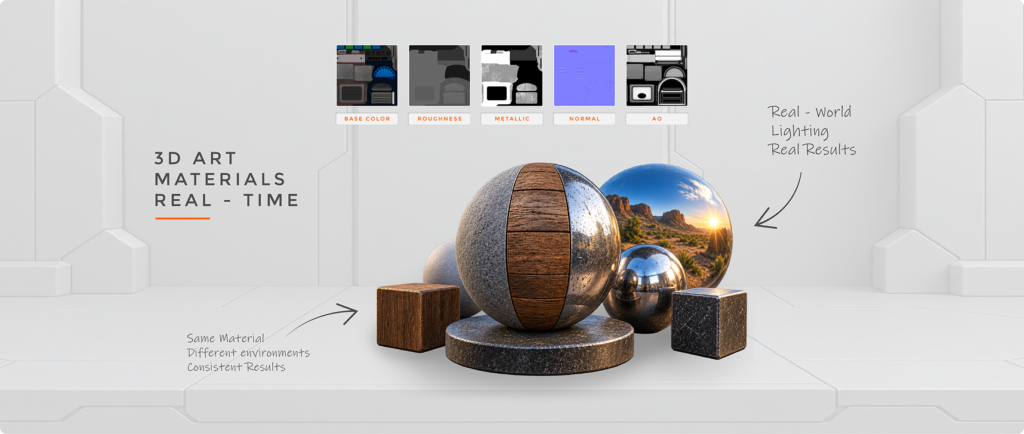
PBR, or Physically Based Rendering, is a shading approach designed to reproduce how materials interact with light in a consistent and physically plausible way.
It is widely used in real-time 3D workflows because the same material can respond naturally under different lighting conditions.
However, using PBR correctly is more than simply connecting a set of textures to a shader. Understanding what each map represents is essential for creating convincing and consistent materials.
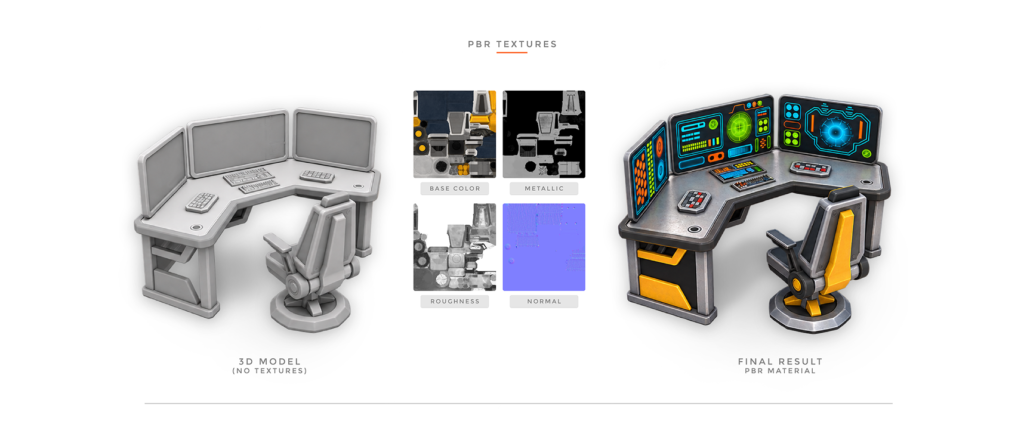
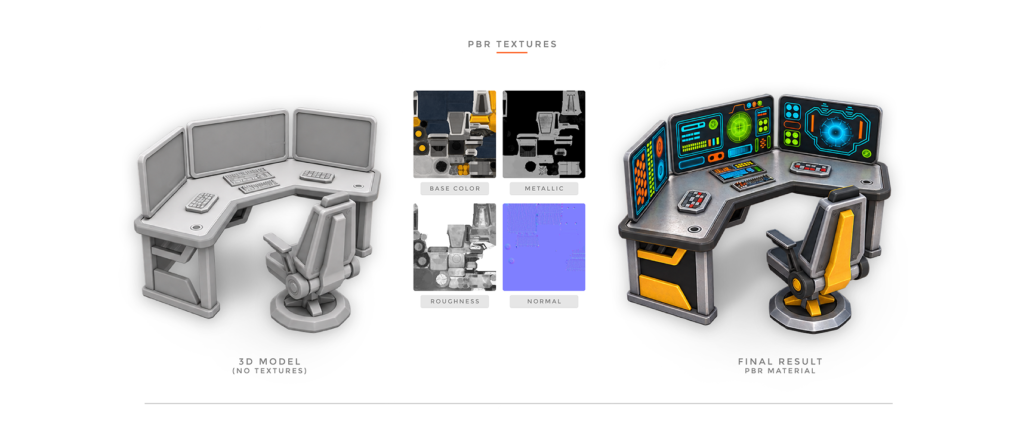
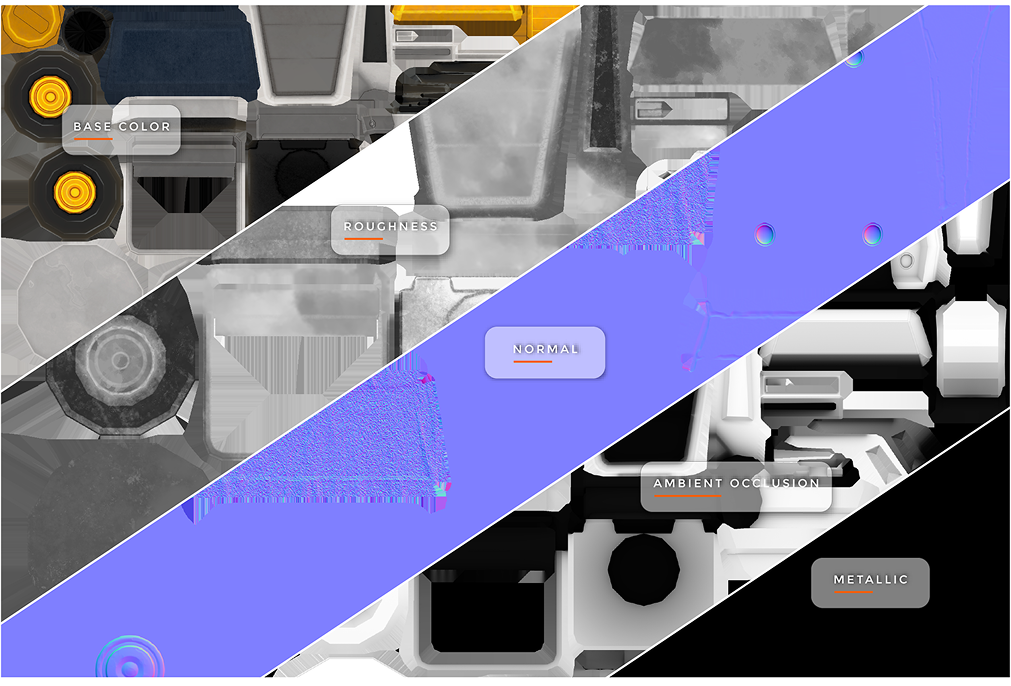
A typical Metallic/Roughness PBR material may contain several texture maps, each controlling a different surface property.
Base Color
The Base Color defines the main color information of the surface.
For non-metallic materials, it represents the diffuse surface color. For metals, the Base Color contributes to the color of their reflections.
Avoid painting unnecessary lighting, reflections, or strong shadows directly into the Base Color. Those effects should normally come from the lighting system.
Metallic
The Metallic map determines which parts of a surface behave like metal.
In a Metallic workflow:
Black = Non-metallic
White = Metallic
Most real-world surfaces are primarily one or the other. Intermediate values are more useful around transitions or when representing effects such as dirt, corrosion, or blended materials rather than creating an arbitrary “half-metal.”
Roughness
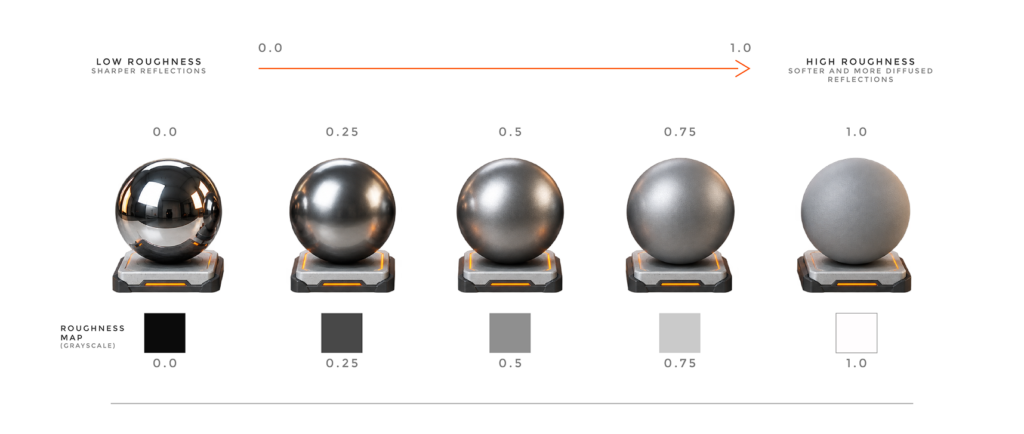
Roughness controls how sharp or blurred reflections appear.
Low Roughness → smoother surface and sharper reflections
High Roughness → rougher surface and broader, softer reflections
Roughness is one of the most important maps for communicating what a material is made of. Two surfaces with a similar color can look completely different because of their microsurface properties.
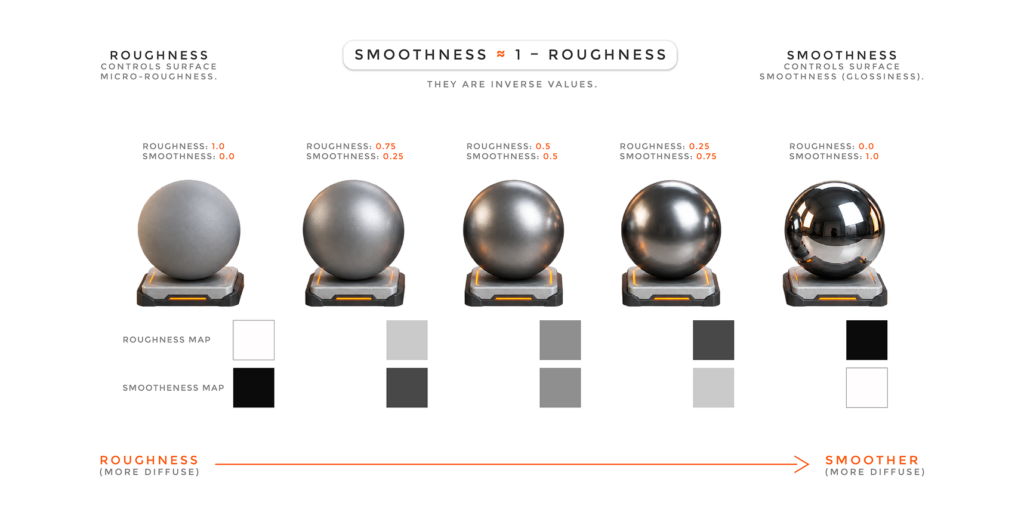
This is a common source of problems when moving textures between different applications.
Some PBR workflows use Roughness, while others use Smoothness or Glossiness.
Conceptually:
Smoothness ≈ 1 − Roughness
This means a white area in a Roughness map represents a rough surface, while a white area in a Smoothness map represents a smooth surface.
For example, Unity shaders may use Smoothness rather than a direct Roughness input, depending on the shader and Render Pipeline. Always check what the target shader expects before connecting your textures. Unity describes higher Smoothness values as producing clearer, more focused reflections.
A Normal Map changes how light reacts across a surface without adding additional geometry.
It is useful for details such as:
Normal Maps are usually recognizable by their blue-purple appearance.
Make sure the texture is imported as a Normal Map when required by your engine. Incorrect configuration can cause unexpected shading.
Normal Maps are excellent for small surface details, but they should not replace geometry when a feature significantly changes the object’s silhouette.
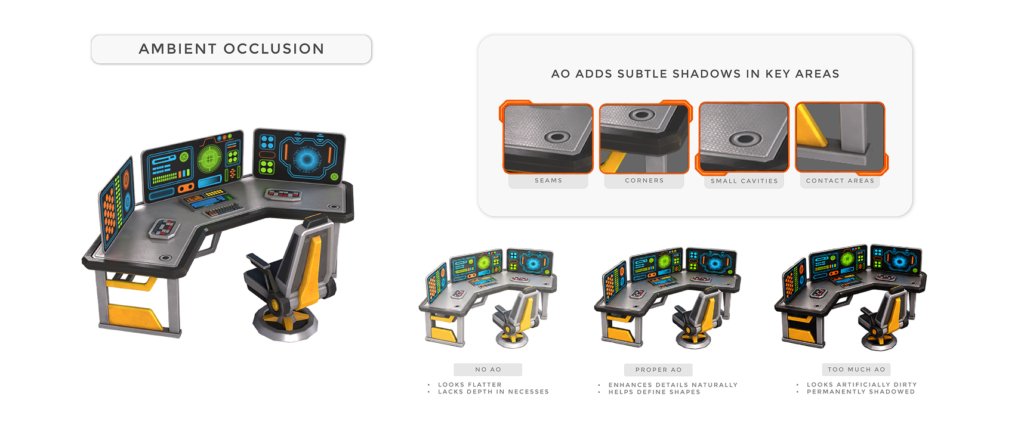
Ambient Occlusion (AO) represents localized occlusion around cavities, intersections, and recessed areas.
It can help reinforce details such as:
However, AO should support the material rather than replace proper lighting.
Avoid using excessively strong AO, as it can make surfaces appear artificially dirty or permanently shadowed.
A Height Map describes variations in surface height using grayscale information.
Depending on the shader and rendering technique, this information may be used for effects such as bump, parallax, or actual displacement.
Height and Normal Maps are related, but they are not identical.
A Normal Map modifies the apparent direction of the surface for lighting calculations, while a Height Map represents relative surface elevation. Adobe’s material model treats Normal and Height as separate surface properties.
One of the most important principles of PBR is consistency.
When creating a material, think about what the surface actually represents.
Ask yourself:
Is it metal or non-metal?
How rough is the surface?
Is it painted, polished, scratched, dusty, or oxidized?
How should it react when the lighting changes?
For example, painted metal is not simply “metal everywhere.” The exposed metal and the paint layer represent different surface behaviors.
Reference images of real materials are extremely valuable when building PBR textures.
Never judge a PBR material under only one lighting setup.
A material that looks correct under dramatic studio lighting may reveal problems in a neutral environment.
Test your assets under:
Pay particular attention to reflections. Roughness and Metallic properties become much easier to evaluate when the material has an environment to reflect.
Making Everything Metallic
Not every shiny object is metal.
Plastic, polished wood, glass, ceramic, and painted surfaces can produce strong reflections while remaining non-metallic.
Confusing Roughness and Smoothness
Always verify which convention your target shader uses before importing the textures.
Adding Lighting to Base Color
Strong baked highlights and shadows can make the material react incorrectly when lighting conditions change.
Using Excessive Normal Detail
Overly strong Normal Maps can make a surface look noisy or unnatural.
Testing Under Only One Light
PBR materials should remain believable when the lighting environment changes.
Before considering your material ready:
Good PBR materials are not created by simply adding more texture maps. They come from understanding how a real surface interacts with light.
A useful workflow is:
Reference → Base Color → Metallic → Roughness → Surface Detail → Engine Setup → Lighting Test
When these properties work together correctly, materials become more consistent, believable, and easier to integrate into real-time environments.